DIY-Calculator Hardware:Upload Utility Project
From DIY-Calculator_Hardware
| Revision as of 15:08, 11 November 2006 Jh (Talk | contribs) ← Previous diff |
Current revision Hzulu (Talk | contribs) |
||
| Line 1: | Line 1: | ||
| - | The user program upload process is handled by the ROM monitor on the DIY Calculator side. But there must be a means of sending a program to the DIY Calculator. While it is possible to send a file with the terminal emulation program a GUI program is preferable. Furthermore, by having a dedicated program for this task it is possible to generate a check sum or use a protocol of choice for ensuring correct transmission. The transmission status (success/failure) can be displayed. This program should be written in "C" using the GTK library of GUI widgets to be easily ported to different platforms. | + | After you have created, assembled, run, tested, and debugged a program on the Virtual DIY Calculator, you will wish to download this program into the Physical DIY Calculator. This requires two things: |
| + | |||
| + | <ul> | ||
| + | <li>A utility running on the host PC that can be used to locate a machine code program on the PC and transmit it to the Physical DIY Calculator.</li> | ||
| + | <li>A routine running in the Physical DIY Calculator that accepts and stores the new program (this routine "lives" in the Physical DIY Calculator's ROM monitor program.</li> | ||
| + | </ul> | ||
| + | |||
| + | In the case of the utility running on the host PC, it would be possible to send a file with the terminal emulation program; however, a more intuitive Graphical User Interface (GUI)-based program is preferable. Furthermore, by creating a dedicated program for this task, it is possible to generate a checksum or use a protocol of choice for ensuring correct transmission. The transmission status (success/failure) can be displayed. This program should be written in "C" using the GTK library of GUI widgets to be easily ported to different platforms. | ||
| <br style="clear:left;" /> | <br style="clear:left;" /> | ||
| <br style="clear:left;" /> | <br style="clear:left;" /> | ||
| + | |||
| ---- | ---- | ||
| + | |||
| <div style="border:0; margin: 20px 20% 0px 0px;"> | <div style="border:0; margin: 20px 20% 0px 0px;"> | ||
| <div style="background:#f9f9f9; padding:0; border:1px solid #aaaaaa; margin-bottom:15px;"> | <div style="background:#f9f9f9; padding:0; border:1px solid #aaaaaa; margin-bottom:15px;"> | ||
| <div style="background:#eeeeee; padding:0 0.4em 0 0.4em; border-bottom:1px solid #aaaaaa;"> | <div style="background:#eeeeee; padding:0 0.4em 0 0.4em; border-bottom:1px solid #aaaaaa;"> | ||
| - | '''Project status''' (11.Nov.2006): | + | '''Project status''' (Jan, 19th 2007): |
| + | </div> | ||
| + | <div style="padding:0.2em 0.4em 0.2em 0.4em;"> | ||
| + | New version of the [[:Media:diy_load-1.3-src.zip|Loader Application]]. Changes: | ||
| + | * added 'Refresh' item in Memory Display/View menu | ||
| + | * added option for starting user program automatically after boot | ||
| + | * created installer package: [[:Media:diy_load-1.3-setup-win32.exe|diy_load-1.3-setup-win32.exe]] | ||
| + | </div> | ||
| + | </div> | ||
| + | |||
| + | <div style="background:#f9f9f9; padding:0; border:1px solid #aaaaaa; margin-bottom:15px;"> | ||
| + | <div style="background:#eeeeee; padding:0 0.4em 0 0.4em; border-bottom:1px solid #aaaaaa;"> | ||
| + | '''Project status''' (Dec, 15th 2006): | ||
| + | </div> | ||
| + | <div style="padding:0.2em 0.4em 0.2em 0.4em;"> | ||
| + | New version of the [[:Media:diy_load-1.2-src.zip|Loader Application]]. Changes: | ||
| + | * solved error that console was grabbed when started in offline mode (linux version only) | ||
| + | * issue a soft-reset (CTRL C) at startup | ||
| + | * add internet link to 'Tools' menu | ||
| + | </div> | ||
| + | </div> | ||
| + | |||
| + | <div style="background:#f9f9f9; padding:0; border:1px solid #aaaaaa; margin-bottom:15px;"> | ||
| + | <div style="background:#eeeeee; padding:0 0.4em 0 0.4em; border-bottom:1px solid #aaaaaa;"> | ||
| + | '''Project status''' (Nov, 20th 2006): | ||
| + | </div> | ||
| + | <div style="padding:0.2em 0.4em 0.2em 0.4em;"> | ||
| + | Update of the [[:Media:diy_load-1.1-src.zip|Loader Application]] after code review | ||
| + | </div> | ||
| + | </div> | ||
| + | |||
| + | <div style="background:#f9f9f9; padding:0; border:1px solid #aaaaaa; margin-bottom:15px;"> | ||
| + | <div style="background:#eeeeee; padding:0 0.4em 0 0.4em; border-bottom:1px solid #aaaaaa;"> | ||
| + | '''Project status''' (Nov, 11th 2006): | ||
| </div> | </div> | ||
| <div style="padding:0.2em 0.4em 0.2em 0.4em;"> | <div style="padding:0.2em 0.4em 0.2em 0.4em;"> | ||
| Line 38: | Line 80: | ||
| '''Plus for those who can't wait:''' We created a simulator program that simulates the real hardware responses. Just connect the two communication ports of your PC via a null modem or connect two PCs via null modem, start the simulator program and try out the DIY Calculator Loader application. Be aware that this is 'not' a CPU simulator (you already have this with the Virtual DIY Calculator); it just simulates the ROM monitor responses. [[:Media:diy_sim-1.0-src.zip|diy_sim-1.0-src.zip]] | '''Plus for those who can't wait:''' We created a simulator program that simulates the real hardware responses. Just connect the two communication ports of your PC via a null modem or connect two PCs via null modem, start the simulator program and try out the DIY Calculator Loader application. Be aware that this is 'not' a CPU simulator (you already have this with the Virtual DIY Calculator); it just simulates the ROM monitor responses. [[:Media:diy_sim-1.0-src.zip|diy_sim-1.0-src.zip]] | ||
| - | For other updates visit the other sections: [[DIY-Calculator_Hardware:Hardware_Project|Hardware Project]] [[DIY-Calculator_Hardware:ROM_Monitor_Project|ROM Monitor Project]] | + | Please view the [[Media:README.txt|README]] file. |
| + | |||
| + | For other updates visit the other sections: [[DIY-Calculator_Hardware:Hardware_Project|Hardware Project]]; [[DIY-Calculator_Hardware:ROM_Monitor_Project|ROM Monitor Project]] | ||
| </div> | </div> | ||
| </div> | </div> | ||
| - | |||
| - | <div style="border:0; margin: 20px 20% 0px 0px;"> | ||
| <div style="background:#f9f9f9; padding:0; border:1px solid #aaaaaa; margin-bottom:15px;"> | <div style="background:#f9f9f9; padding:0; border:1px solid #aaaaaa; margin-bottom:15px;"> | ||
| <div style="background:#eeeeee; padding:0 0.4em 0 0.4em; border-bottom:1px solid #aaaaaa;"> | <div style="background:#eeeeee; padding:0 0.4em 0 0.4em; border-bottom:1px solid #aaaaaa;"> | ||
| - | '''Project status''' (7.Nov.2006): | + | '''Project status''' (Nov, 7th 2006): |
| </div> | </div> | ||
| <div style="padding:0.2em 0.4em 0.2em 0.4em;"> | <div style="padding:0.2em 0.4em 0.2em 0.4em;"> | ||
| Line 52: | Line 94: | ||
| </div> | </div> | ||
| </div> | </div> | ||
| - | |||
| - | <div style="border:0; margin: 20px 20% 0px 0px;"> | ||
| <div style="background:#f9f9f9; padding:0; border:1px solid #aaaaaa; margin-bottom:15px;"> | <div style="background:#f9f9f9; padding:0; border:1px solid #aaaaaa; margin-bottom:15px;"> | ||
| <div style="background:#eeeeee; padding:0 0.4em 0 0.4em; border-bottom:1px solid #aaaaaa;"> | <div style="background:#eeeeee; padding:0 0.4em 0 0.4em; border-bottom:1px solid #aaaaaa;"> | ||
| - | '''Project status''' (12.Oct.2006): | + | '''Project status''' (Oct, 12th 2006): |
| </div> | </div> | ||
| <div style="padding:0.2em 0.4em 0.2em 0.4em;"> | <div style="padding:0.2em 0.4em 0.2em 0.4em;"> | ||
| Line 66: | Line 106: | ||
| <div style="background:#f9f9f9; padding:0; border:1px solid #aaaaaa; margin-bottom:15px;"> | <div style="background:#f9f9f9; padding:0; border:1px solid #aaaaaa; margin-bottom:15px;"> | ||
| <div style="background:#eeeeee; padding:0 0.4em 0 0.4em; border-bottom:1px solid #aaaaaa;"> | <div style="background:#eeeeee; padding:0 0.4em 0 0.4em; border-bottom:1px solid #aaaaaa;"> | ||
| - | '''Project status''' (19.Jul.2006): | + | '''Project status''' (Jul, 19th 2006): |
| </div> | </div> | ||
| <div style="padding:0.2em 0.4em 0.2em 0.4em;"> | <div style="padding:0.2em 0.4em 0.2em 0.4em;"> | ||
Current revision
After you have created, assembled, run, tested, and debugged a program on the Virtual DIY Calculator, you will wish to download this program into the Physical DIY Calculator. This requires two things:
- A utility running on the host PC that can be used to locate a machine code program on the PC and transmit it to the Physical DIY Calculator.
- A routine running in the Physical DIY Calculator that accepts and stores the new program (this routine "lives" in the Physical DIY Calculator's ROM monitor program.
In the case of the utility running on the host PC, it would be possible to send a file with the terminal emulation program; however, a more intuitive Graphical User Interface (GUI)-based program is preferable. Furthermore, by creating a dedicated program for this task, it is possible to generate a checksum or use a protocol of choice for ensuring correct transmission. The transmission status (success/failure) can be displayed. This program should be written in "C" using the GTK library of GUI widgets to be easily ported to different platforms.
Project status (Jan, 19th 2007):
New version of the Loader Application. Changes:
- added 'Refresh' item in Memory Display/View menu
- added option for starting user program automatically after boot
- created installer package: diy_load-1.3-setup-win32.exe
Project status (Dec, 15th 2006):
New version of the Loader Application. Changes:
- solved error that console was grabbed when started in offline mode (linux version only)
- issue a soft-reset (CTRL C) at startup
- add internet link to 'Tools' menu
Project status (Nov, 20th 2006):
Update of the Loader Application after code review
Project status (Nov, 11th 2006):
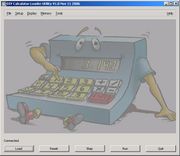
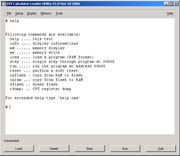
It enables you to do the following via graphical user interface:
- load a user program to the DIY Calculator hardware
- save the user program into onboard flash memory
- run the user program
- single step through the user program
- display and update CPU registers during single step
- view an arbitrary area of memory of the DIY Calculator
- select a hexdump or a disassembler view
- purge the DIY Calculator's memory
- display the most important I/O ports
- select the CPU speed. Caution: When setting the CPU clock speed to real slow values (ca. < 1MHz), the communication between the DIY Calculator hardware and the Loader application is not guaranteed to work reliable!
- open a terminal to the DIY Calculator hardware
The application is available both in Windows and Linux. It requires the GTK Widgets runtime library, version 2.6.4 or newer. Linux users will most likely have already installed GTK, Windows users may download the latest runtime from here: [1].
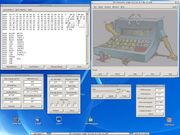
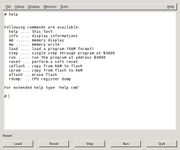
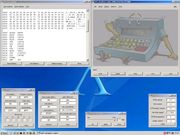
View more screen shots:
Linux:
Windows:
Plus for those who can't wait: We created a simulator program that simulates the real hardware responses. Just connect the two communication ports of your PC via a null modem or connect two PCs via null modem, start the simulator program and try out the DIY Calculator Loader application. Be aware that this is 'not' a CPU simulator (you already have this with the Virtual DIY Calculator); it just simulates the ROM monitor responses. diy_sim-1.0-src.zip
Please view the README file.
For other updates visit the other sections: Hardware Project; ROM Monitor Project
Project status (Nov, 7th 2006):
A lot has happened since the last update. The loader application has made great progress.
Project status (Oct, 12th 2006):
work started
Project status (Jul, 19th 2006):
considered
